We first began to build the hoop house for more tender plants to grow in, but when we got all our chicks we looked at this space and decided to add to it and make ourselves a chicken hoop coop.
The first thing we needed to do was add a second hoop house and then figure out how we wanted to build out the enclosed coop portion. After considering our options we chose to buy an 8 x 6 metal shed to place at the end of the hoop coop. We also placed a door between the two hoops so we could separate the two hoops and to be able to finish the first part of it sooner rather than later.
 |
| Original hoop house we intended to cover with shade cloth and use for plants |
 |
| The second hoop will go up right next to the first, doubling the original 12 x 12 space |
 |
| Gluing the pvc sticks together for the hoops span |
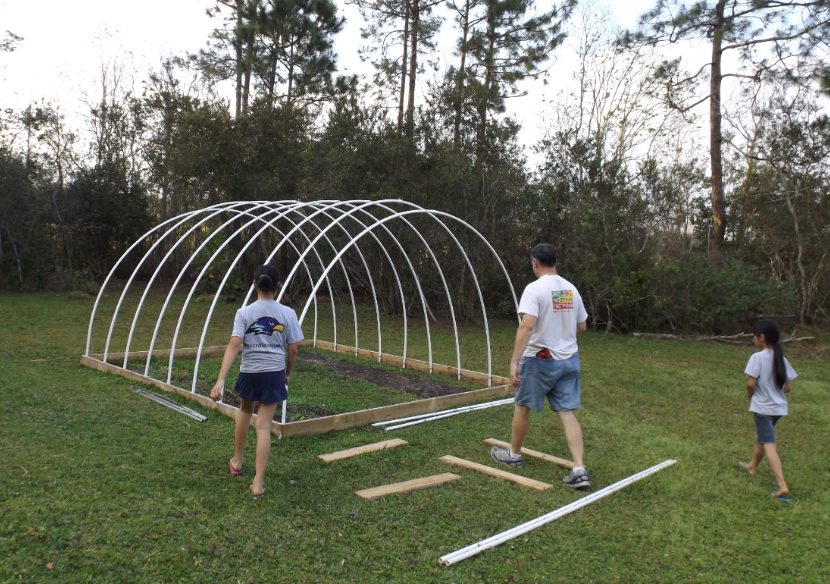
 |
| The girls helping Kevin secure the hoops in place |
 |
| Preparing the wood end pieces for securing the two hoops together and to be able to install a door between them |
 |
| Both hoop houses ready to go |
 |
| View from the end we'll put the shed and side access doors on |
To buy time as we built the coop and with the chicks outgrowing their multiple tubs in the garage, we picked up and built this temporary coop next to the house, reusing a coop that was being removed at a house my uncle toured when he was looking to buy a home to move into down here. He asked the owner about taking it off their hands and she was all too happy to have us finish taking it down and haul it away. It worked out well, and gave us the time we needed to complete the build out correctly. Plus saved us having to invest in a temporary coop - got to love that!
 |
| Kevin putting up the temporary coop by the side of the house |
 |
Shed base added to the end of hoop area. It took awhile to get this completely level
as the ground here was really uneven |
 |
| Shed build out |
 |
| Shed ready for doors - We also had to cut and add extensions to the last two pieces of pvc to allow for the height of the shed roof. Then added extra wood on the shed to staple the hard wire to. |
 |
| Shed doors being built |
 |
| Kevin worked to have the door panels overlap for security and weatherproofing |
 |
| The window design for both doors - hinged flap with hard wire and screens |
 |
| Door installation |
 |
| And the hardware added to lock everything up |
 |
Windows cut into back of shed
|
As the shed went up we put in features we felt would be useful. These included insulation, moisture barrier, plastic on the lower part of the walls and laminate flooring with a board across the double doorway for using the deep litter method with pine shavings. The windows have both hard wire for safety and screen to keep the little bugs and mosquitoes out. The chicken door has a rope for opening and closing from the outside by the main doors, and the main double doors have larger windows for good air flow.
 |
| Windows and chicken door framed out |
 |
| Sizing laminate for floor |
 |
| Flooring in and framing done |
 |
| Plastic for wall barrier being cut |
 |
| Chicken door added and wire for windows. Moisture barrier up on walls |
 |
| Roosting bar in, plastic over moisture barrier and on chicken door |
 |
| Pine shavings down |
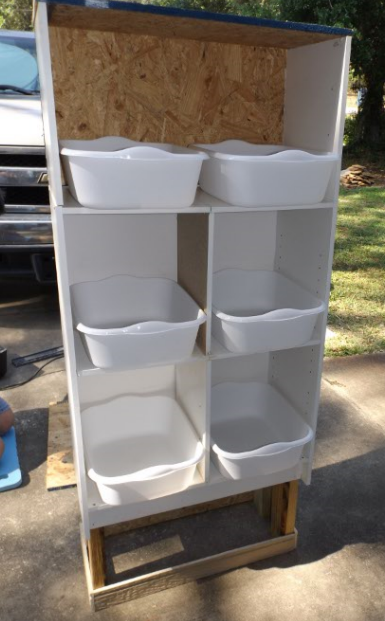
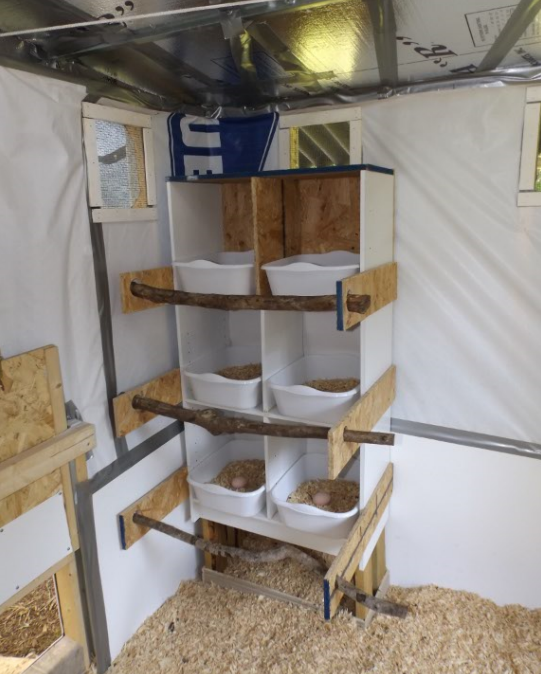
The roosting bar inside was made using scrap wood and branches cut from our trees. The nesting boxes are dollar store plastic tubs in a repurposed homeschool cabinet the girls had broken the doors on. We can add another set of nesting boxes as needed.
 |
| Old school cabinet repurposed for nesting boxes. Kevin still needs to add bars to the front for access. |
 |
| Ceramic eggs for nesting boxes |
 |
| Nesting boxes installed. These have the stepped up bars across the front for access to all levels. |
 |
| Window hooks installed to keep windows open for air flow |
 |
| Close up of the hooks |
With the shed interior completed, it was time for the hard wire to go up on the first hoop attached to the shed. We carefully overlapped the wire for added strength and security. Once the wire was in place, the side doors were installed. We intend to make chicken tunnels to move the birds around the yard so these doors will assist in more easily channeling the birds out and into the tunnels or chicken tractor.
 |
| Looking at the hoop coop from the opposite side - ready for wire |
 |
| First side wire up |
 |
| Back wall - putting wire up. My uncle came over to help us out. |
 |
| Covered with wire. You can see the cut pvc and extra wood to secure the wire and the hoop to the shed. |
 |
| Wire with extra security and base wire |
 |
| Overlapped wire is zip tied and wire wrapped together |
 |
| Base wire is stapled to side, zip tied and weighted on bottom |
 |
| View from the back |
Once the wire was up on the hoop, we overlapped and added wire to extend out from the base for anything that might try to dig in and then weighted it down for now with large pine logs from the tree we had taken down. With all this done it was time to add a roost. We reused the roof portion of the free coop we got and added branches to its sides. Now it was time for a cover to protect from rain and sun. I found an agricultural fabric cover at Tractor Supply that was perfect and less expensive than the shade cloth we were originally looking at using. Once I had this up and secure it was time for the chickens to check out their new lodgings.
 |
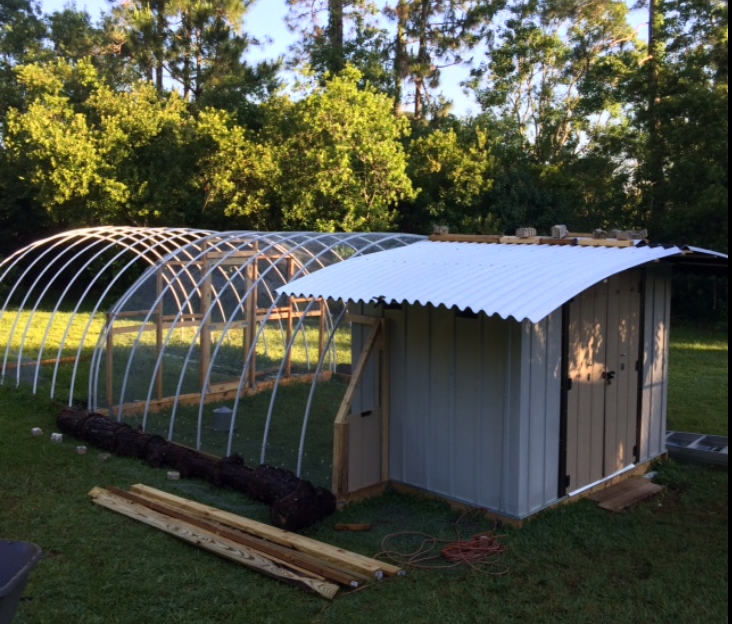
| Exploring and loving their new space |
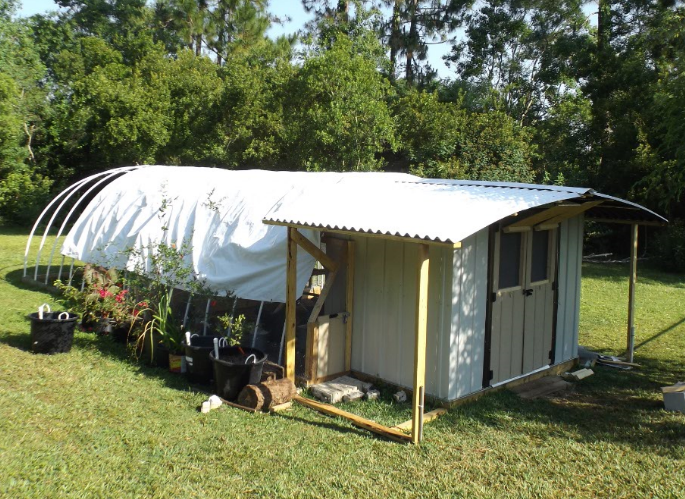
They made quick work of clearing out the lawn and weeds as they happily scratched and pecked at the ground. We still had the chicken door to the shed closed off because the interior shed temperature remained too warm. We decided after considering our venting or cupola options, to add a second roof when we found the light weight, but well insulated corrugated cellulose fiber/asphalt roof panels at Lowe's. Even better they were clearing out their stock of white panels and the price was half what it had originally been. We decided to buy four and the center roof vent, then build side supports so there would be a shade and rain overhang for the sides and front of the shed. We also added a layer of insulation between the original shed roof and the second roof. The temperature difference was substantial and made the interior comfortable, even with the recent heat wave we've had.
 |
| Putting the furring strips down to attach the panels to |
 |
| Adding insulation between roof sections |
 |
| 1st panel in place |
 |
| Putting the roof vent on |
 |
| Second roof on with vent weighted down while liquid nail product dries |
 |
| Side support lumber added - I still need to paint this and the doors |
 |
| Hoop coop with side support up and agriculture fabric on hoop |
With the roof done it was time to open the door and let the chickens check out the interior. Despite all our hard work it took them two full days to get past being "chicken" and willingly walk and stay inside. Now they love it and regularly hang out in there.
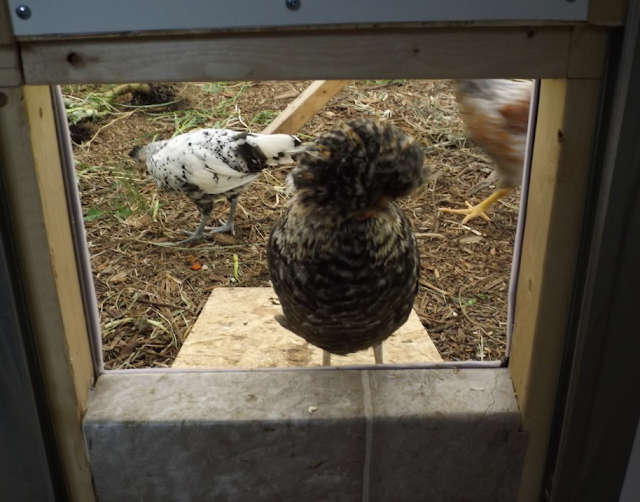 |
| One of the Polish chickens deciding if its safe to come inside |
 |
| Right side access door |
 |
| Left slider side access door |
We still have the second hoop to complete with an end door and wire. For now it's partially covered with the agrofabric and makes for a nice shady area to stand and watch the chickens antics, or duck under when you're working in the yard and the heat or sudden rain shower causes you to seek a bit of shelter. Once the two side are complete, I'll work to add planting beds next to the coop, some paint and trellises to make the coop more attractive and to make use of plants to act as insect repellent, shade and additional feed for my girls.
 |
| View from window in back of shed at hoop with shade cloth that covers part of the second hoop. |
 |
| Hannah holding one of the Polish chickens inside the coop |
So that's it for now on our hoop coop. I'll update once we complete the second section and add some decorative touches to improve the appearance and add useful shading plants on a trellis.