Friday, August 22, 2014

Tractor Storage Shed


I posted before about having Lowe's deliver block and sheds so we can organize and make room in the garage.  After completing the 1st small one near the tower gardens to hold the pots, fertilizers etc..., it was time to start on the first of the two larger sheds.  We chose a spot near the well house in front and then had to clear some small trees and shrubs and level the site.

The site before.  The well house and wood pile from previous owners.  We plan to eventually redo the well house. The shed is now where the trash cans were in this picture.  The palm and small tree to the left of it had to be cut way back

These are the sheds and block on the day they were delivered

Once this was done we began to lay the cement block base to give a secure footing to the shed floor and to raise it a bit to keep the interior dry in our heavy downpours.

Block pile ready to be used, and Kevin measuring out the base area.

Once he measured everything out we leveled and he began setting the blocks in place, as I restocked his supply of them and hauled off the materials we'd cleared for the green waste pickup

Kevin took the time to be sure all the block was absolutely level, so when he was all done we could set the shed's rubber base in place without having any problems because the foundation wasn't just right.

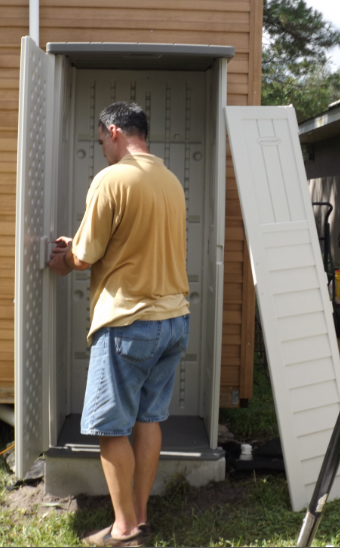
Once the block was all done and leveled, the rubber base of the shed was set in place.  Kevin put the windows into the shed doors and sides and then it was time to start putting the shed together.  Cameron came out to help with this.

The base came in two pieces that once laid down were secured together with screws

Base done


The windows for the door set in place
Side panels going up

Doors, back window and front panels are now in place.
Once all the sides were fitted together, the side roof panels were put on and finally the top piece.  These were all secured with the screws provided. We were now ready to pour the rock in the front to allow Kevin to drive the lawn tractor into the shed.

Roof panels added

Shed done

Kevin, then installed pegboard with hooks and shelves so he could hang garden tools.

The tool holders on either side of the shed.  There's also room in the back to add shelves and we'll do that later.


TA DA!!!!

All done!! It looks great, even if I do say so myself. And has already opened up a large area in the garage now that the tractor is out of it.  It was so hot during this project, that we had to do several changes of clothes and take A LOT of water breaks, to deal with the intense heat and humidity, but I think the effort was worth it.

The clearing has started for the last of the sheds we bought.  It's another one like this shed and will go up near the tower garden area.  I'll cover this in another post.


Tuesday, August 19, 2014

Roasting Coffee


Returning to some of our Do-It -Yourself goals Kevin tried a new challenge of roasting our own coffee.  We are coffee lovers and really enjoy a deep roasted, rich cup of coffee.  So after doing a lot of online research of the various types of coffee, how to sources etc...  He located suppliers of the green beans and ordered a 5 lb. bag of Colombian and a 5 lb. bag of the House Blend from Caracolillo Coffee, a store and online supplier of mills, beans and other coffee related goodies. Here's their link :ccmcoffee.com

We had found an old air popcorn popper at an estate sale for $4.00, that's the style that many of the sites say is the best for this simple method of roasting coffee beans and now with our beans it was time to put this to a test.  Kevin got all his supplies together and  set them up in the garage because we wanted the air flow and to control the smell as some sites said it could get quite strong. We didn't find the odor offensive at all, in fact the garage smelled wonderful, We did find though, that you need the air flow we could get with the partially opened garage door, or you would need a good exhaust fan to clear off the smoke it puts out in your work area.


With the beans measured out.  A box he set up to catch the chaff as the beans roast, his phone set up as a timer he was ready.  We watched as they whirled around the popper and then as they heated up the chaff began to fly off.  Then as the time hit about 5 minutes the first pops known as "first crack" took place and we could smell the roasting beans and begin to see a color change.

You can see the pale green color of the beans here

Kevin with the popper and his box set up to catch the flying chaff as it roasts


We kept watching not wanting to burn the beans by letting them go too long, but wanting them dark enough to really get the flavor we like.  A "second crack" of the beans happened a little bit later and then at the 16 minute mark we achieved the color and smell that looked right.

The beans are then poured into a strainer to let them cool, then placed in a jar with a loosely placed lid for about 24 hours to let the oils release and the flavor set in.  Kevin has made several batches now and is becoming quite proficient at this.  The flavor is really good and it's been a truly satisfying experience.

Beans in popper ready to start


As beans roast and get darker you can see all the chaff flying off here

Bean color before and in process

We'll keep looking for these old poppers at thrift stores and garage sales, until a time we may want to invest in a more substantial roaster.  Since the green beans can last for years, we'll probably stock up and keep them on hand especially since coffee prices are expected to get higher, it can be our little hedge on inflation and an indulgence for something we are hard pressed to do without (insert big smile).

Color difference of the green beans and the next day with the roasted house blend beans

This has been a fun and really worthwhile experience.  Kevin will be making a video and have all his resources soon on our Project-128 blog that I have a link to on my side bar.  All this has made me ready for a nice cup of coffee!!

Have a great day.


Friday, August 15, 2014

Do You "Pin It ?"


I have a new obsession Pinterest.  It's been around for awhile and I've checked other peoples boards for some time now, but more recently I began making my own boards.


It started on a rainy day, and we've had LOTS of those lately!!  Not really having anything pressing to do I thought I'd start a board of pretty things I found and wanted collections of these "pins".  After creating my first board "So Pretty", this led to a Classic Style board of clothes and styles I like.  Then I began a board on beautiful gardens that inspire.


Shortly after starting these I was invited to contribute to a board that's a collection of pretty, romantic and inspiring pins.

When I have time, I'll sit and spend a bit of it searching for inspiring pictures to pin to my boards, and now as I prepare to get my yard and gardens looking better I've started a board for planting ideas for Central Florida's climate and unique challenges as well as opportunities.  Having a desire to get the house more organized I also created a board for organizing ideas.  These boards serve to have a quick reference for helpful ideas and with the pins linked to sources, articles or blogs there's helpful information attached with the images.


So, how about you. Do you Pinterest?


Friday, August 8, 2014

Violin Lesson


Hannah has been wanting to take violin lessons for quite a long time.  Our oldest daughter Amber tried my mothers violin on a visit years ago and when Baba passed her violins on to Amber she took lessons and played for several years.  Then as life got busier for Amber, she set the violin aside and later passed hers on to Hannah.  The one 1/4 size is too small for regular playing and the full size is still too large for Hannah, so when I recently found a music store that offers lessons and rentals we signed her up.


Yesterday was her first lesson with Mrs. Bennett and Hannah was SO excited!  After fitting her with a 3/4 student violin her first class began.  Her teacher had to work with her to get a comfortable and secure grip on the bow with her little hand, then began showing her the correct position for playing the notes.

Playing together to get the correct notes

Once Hannah was able to locate and play these, she began the process of teaching her the count she needed for the new music symbols Hannah has in her notebook.  Not bad for a first class, and now with her violin and note book she's working on mastering the new challenge of learning to play this instrument. As she gets these initial steps down, the work to learn fingering will begin.


So happy for her and thrilled to have found such a patient and talented teacher.


Tuesday, August 5, 2014

Let The Organizing Begin


When we moved from California we left a home that with our additions was almost 3000 sq. ft.  We had a barn/garage that was 24ft x 36ft. and was 2 stories.  There was also shed that was 12 x 24, so we had plenty of room for our stuff and storage.  Though we got rid of literally loads of things prior to our move, we still brought a lot with us, and with this house being just under 2000 sq. ft and Cameron's shed/room that's 12 x 20 we have far less space.  So as we've been getting ourselves settled over this last year, storage and organization is have been issues we're still working out.

We've made a lot of progress and had previously added a tool shed that's a 7 x 7 over near the tower garden area.  In an effort to further straighten out the garage we've purchased 2 more 7x7 ft shed's and a small one to organize the plant foods, tower pots, hydroponic nutrients, etc that was the first one to be put up and in place today.

Lowe's delivered the blocks we'll use as foundations and the 3 sheds first things this morning.


Then Kevin cleared the weeds behind Cameron's shed near the pipes.  He set the blocks in place and leveled them around the pipes, to be able to protect them and make use of this space.

Space behind Cameron's shed and Kevin weeding it.

Once, his foundation was ready he enlisted the girls to help him fit the pieces of the small shed together. Then to stand in and weight it down as he set the roof piece on.

Blocks in place and leveled around pipes and weed barrier cloth.
Hannah and Lauren helping dad


All done.

Once this was together, Kevin set it in place and put the doors on.  The shelves still need to be cut to size and added, but we have our new storage place and as the title of this post says, "let the organizing begin"!!